
The Adobe Commerce admin panel gives the user near total control of your website(s); from customer data, marketing campaigns, and advertising content to the ability to process customer orders. Throughout a website's lifecycle, a surprising amount of people will need access to the admin panel for a variety of reasons. Some of them will need it for a short-term basis like a 3rd party developer troubleshooting an issue, and some of them only need it for specific cases like your in-house product or customer service teams. And we're willing to bet that you give all of them the same, unrestricted, administrator access. But you don't have to!
Did you know that you can provision admin access for a limited time, for focused areas, and for view/edit ability instead of simply providing full administrator access to your entire admin panel? In this article, you'll learn how to do all of these things so you can stop worrying about someone accessing sensitive user data, rearranging your category tree during peak hours and triggering a full reindex, or accidentally turning off your shipping configurations.
Before we get started, there are a few areas that we recommend only your agency, in-house developers, and in-house IT teams have access to.
- Stores
- System
- Extensions > Integrations
- Tools
- Permissions
Modifying Admin User Data
System > Permissions > All Users
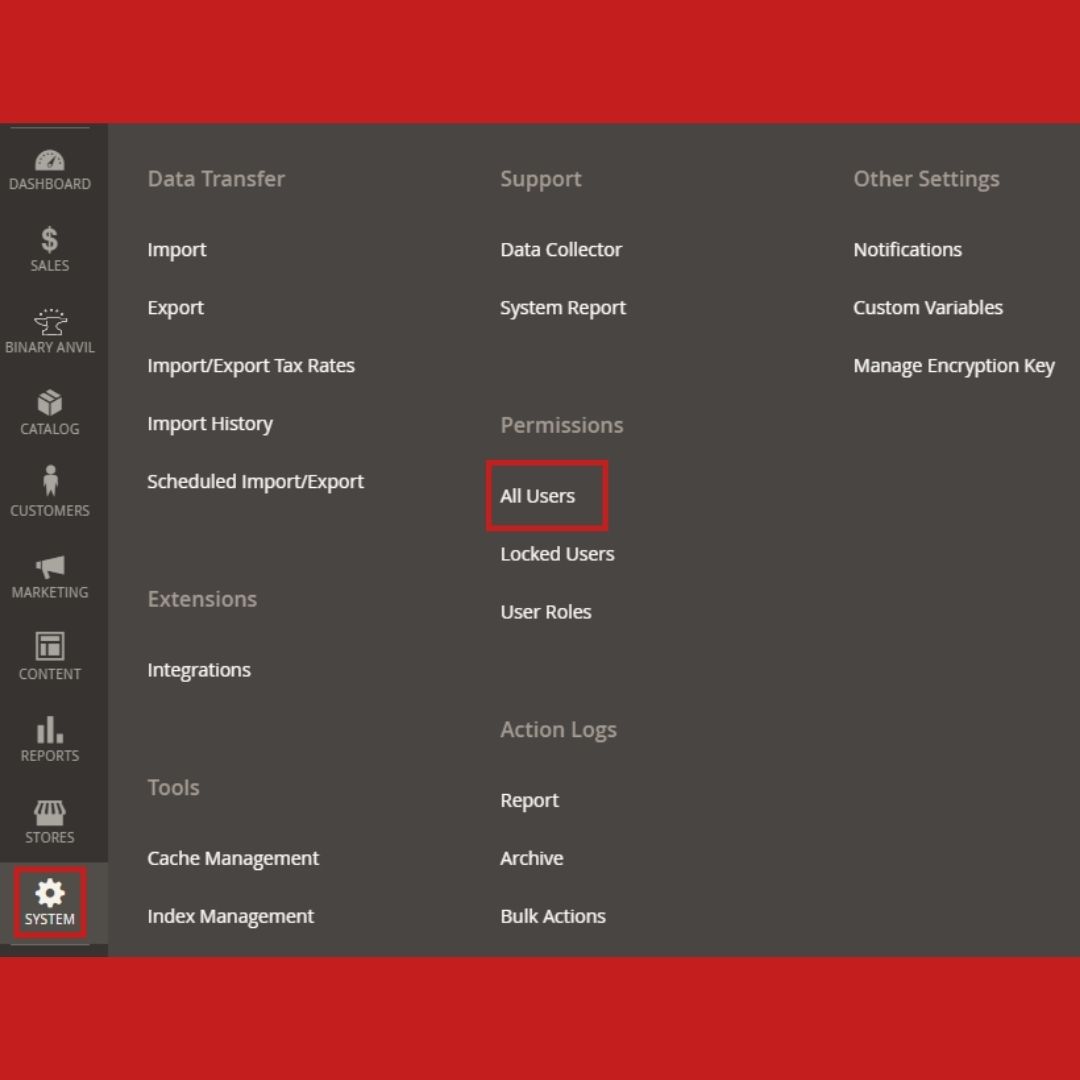
From here, you can see a list of all of your admin users at a glance, including their first name, last name, email address, role, and status. Let's talk more about those last two.
A user's role defines as:
- What areas of the admin they can see
- What they can do (view, edit, delete) in those areas
A user's status defines whether their user is active (can log in to the admin) or inactive.
Double-clicking on a specific user allows you to change their PII, reset their password, set an expiration date that their account is active through, and define their user role. But most likely, if you're reading this, you only have an administrator role (default) set up. Scroll on to see how to set up different user roles.
Creating New User Roles
Let's say we're creating a role for our customer service team. They need to be able to see and edit customer accounts and order data and it would be nice if they could see but not edit product data.
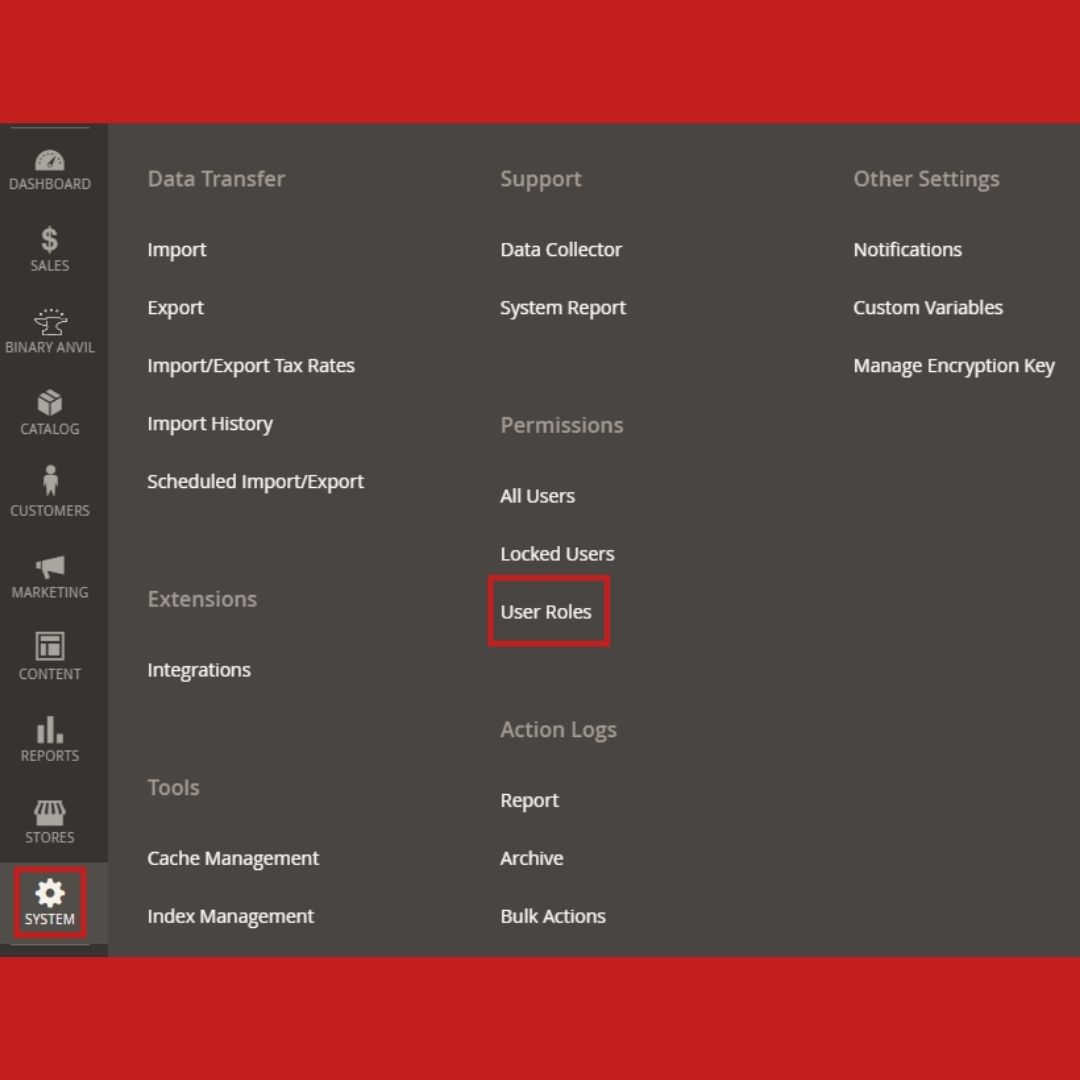
Navigate to: System > Permissions > User Roles and click 'Add New Role'
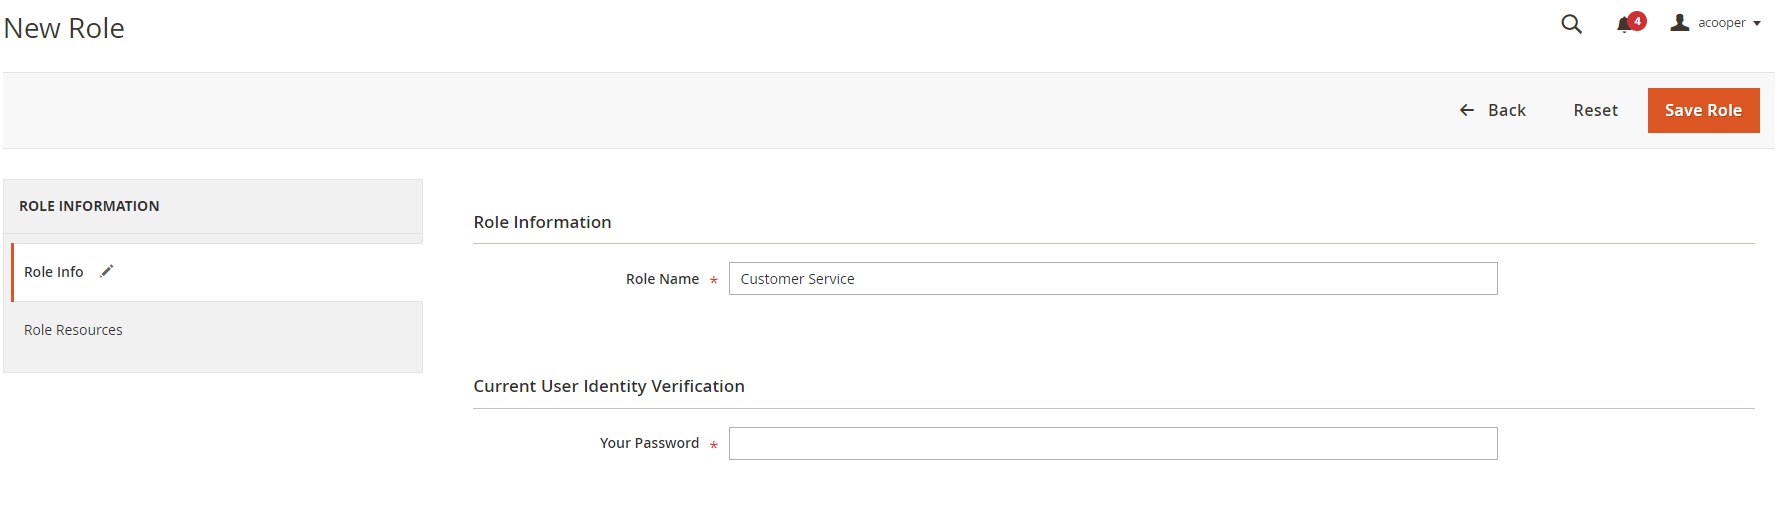
First, you'll need to define a role name. You'll want to make it self-explanatory like "Customer Service." You can skip entering your password for now and click on the role resources instead.
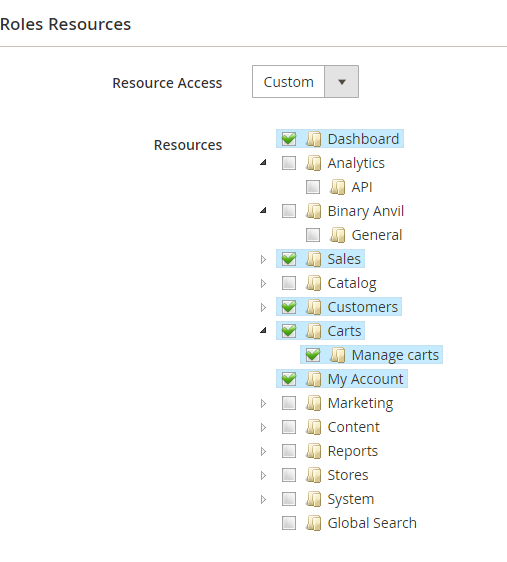
On the role resources tab, you'll define what areas you want this new role to be able to see and edit. For all users, you'll want them to have Dashboard and My Account access so that they can manage their passwords and see the dashboard sections so go ahead and check those.
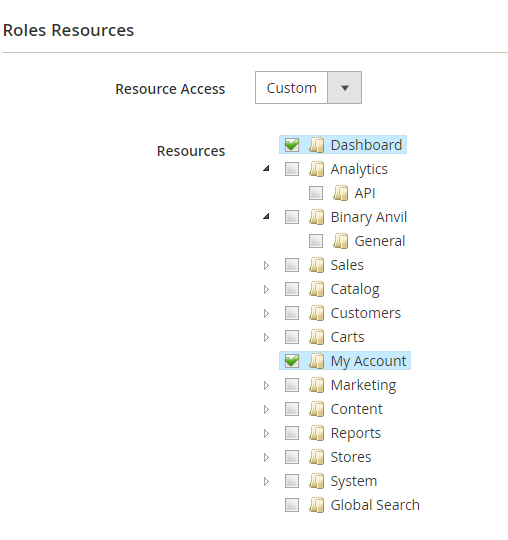
Additionally, since this is the customer service role, they should also have full access to Sales, Customers, and Carts so that they can more efficiently assist in supporting your customers. When you check these boxes, you can uncheck any areas you do not want them to have access to. For example, if you did not want them to be able to accept or deny payments, you would uncheck that box under Sales > Orders > Actions. For this example, I've left everything checked.
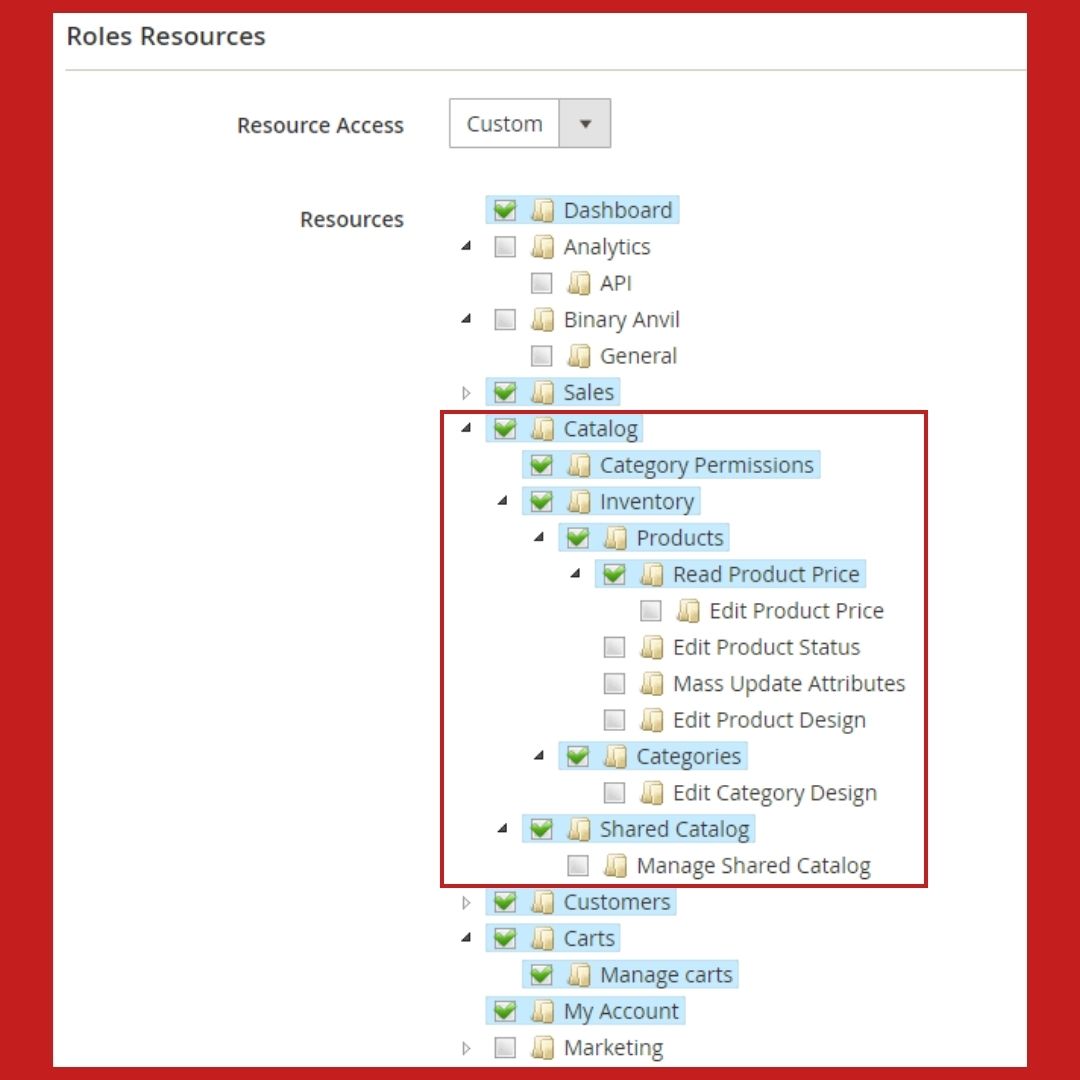
Now let's provision Catalog access, remember we only want users with the customer service role to be able to see but not edit products. So, let's check the catalog box and uncheck anything that allows the user to modify products, product attributes, or categories.
All set! Now you just enter your password, click the 'Save Role' button at the top right, return to System > Permissions > All Users, click a user, and assign the user to that role.
In this article, you have learned how to create a new user role, assign users to that role, and manage other user data in the Adobe Commerce admin panel. These actions combined will give you more control over what the users in your admin panel have access to view and modify, thus reducing your risk exposure for accidents that can have significant financial impacts on your business. If you enjoyed this article and have found yourself in a scenario where something was changed in the admin accidentally, keep an eye out for our upcoming article "Who done it? - How to find and use the admin action log."